Filament costs more per kilogram than the plastic in a bucket from a hardware store, and less per part than almost any other way of getting a custom object made. Both facts are true and the second one matters more.
How this page is funded. Buy links go to Amazon and we earn a commission on qualifying purchases at no extra cost to you. Commission never decides an order or a score, we accept no free products or sponsored placements, and every roundup names something to skip. Full disclosure.
The picks, ranked
The picks, ranked
#
Product
Best for
Score
Price
1
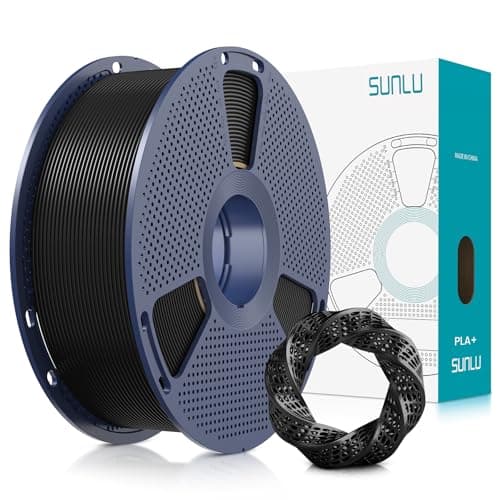
SUNLU PLA+Cheap enough that the per-part cost of most prints stops being worth thinking about.Toughened PLA+, 1 kg
Live prices verified October 16, 2026. Scores are our own fit rating for the stated use, not a measurement and not a customer rating.
A calculator and notepad on a workbench.
Expensive compared to what?
Against raw plastic pellets, filament is expensive: you are paying for precision extrusion to a stated diameter tolerance, which is most of what the price is.
Against any other way of getting a one-off custom plastic part made, it is remarkably cheap. Injection molding requires a tool that costs orders of magnitude more than a spool before the first part exists. CNC machining charges by the hour. A commercial print service charges for the print plus a margin.
Against buying the object, it varies. A printed phone holder is cheaper than a bought one; a printed enclosure that took nine hours and needed two attempts probably was not, once you count the time.
The per-part number that surprises people
Most printed objects are small. A phone stand, a bracket, a replacement knob — these use tens of grams, not hundreds. At any filament price on this site, a part like that costs a small fraction of a spool.
The intuition that filament is expensive comes from buying a spool and seeing the total, not from dividing it by the number of parts it produces. Your slicer reports grams used for every print; look at that number once and the impression usually changes.
The costs that are not the filament
Failed prints. The dominant cost in this hobby by a wide margin, and it is why storage outperforms upgrading brand as a first purchase.
Consumables. Nozzles, build surfaces, glue, PTFE. Small individually, ongoing collectively — see consumables.
Your time. The largest cost and the one nobody counts. If a part takes three attempts, the filament was not the expensive part.
Reducing cost without buying cheaper filament
Print fewer failures. Dry filament, a clean plate, a calibrated first layer. Free, and the highest return available.
Use fewer, wider walls. A 0.6 mm nozzle at three walls uses less material and prints faster than 0.4 mm at five, and produces a stronger part.
Stop at 40 percent infill. Beyond that you are buying time and material for very little strength — see how strong PLA is.
Design out supports. Support material is waste by definition, and orientation removes most of it.
Test print small. A ten-minute first-layer patch catches most failures before they eat a spool.
The verdict
For small custom parts, filament is one of the cheapest manufacturing inputs available to a household. For large parts it is a real cost worth designing around. And in both cases the filament is rarely the expensive part of the print — the failures are.
Every pick, in detail
01
SUNLU PLA+
SUNLU
The everyday answer · 9.0/10 our fit score
The cheapest filament we would load without flinching, and the reason most people never need to spend more.
Most everyday objects use tens of grams rather than hundreds. Your slicer reports the exact figure for every print, and looking at it once usually changes the impression that filament is expensive.
+ − Is it cheaper to 3D print something or buy it?
For custom or unavailable parts, printing wins easily. For mass-produced items it usually does not once you count time and failed attempts. The strong case for printing is the part nobody sells.
+ − How can I reduce filament costs?
Fail less first: dry filament, clean plate, calibrated first layer. Then use fewer wider walls, stop increasing infill past about 40 percent, and design out supports.